corsotechnicaldrawingiso5457

Technical drawing from scratch, 1: principles, sheet, title block and scale

First lesson of a technical drawing course from scratch: what a technical drawing is, the ISO and UNI standards, the A-series sizes, border and title block, and scale with its calculations.

Paulo Giavoni

Paulo Giavoni

Engineer & BIM Specialist

1 October 20266 min read

A language, not an art#
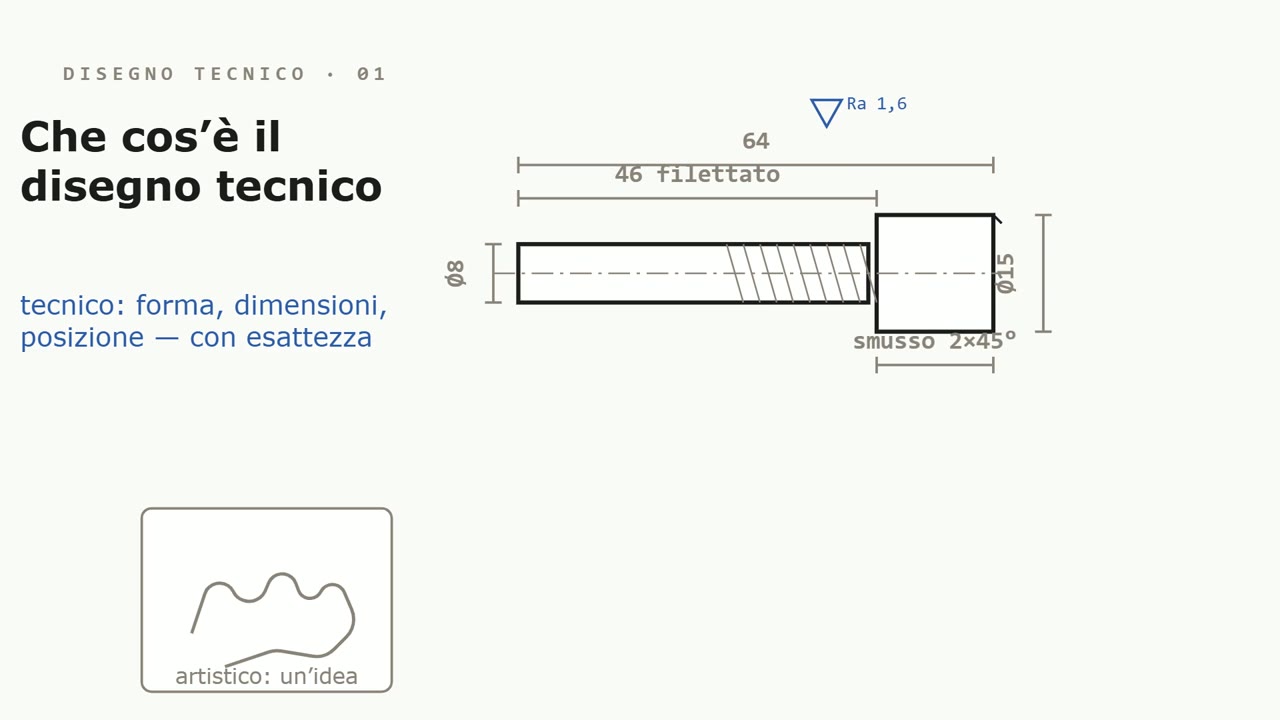
A dimensioned pin: diameter, lengths, chamfer, roughness; nothing to interpret
This is the first episode of a complete technical drawing course that starts from zero: you don't need to have ever drawn before. Technical drawing is a language with precise rules, and it has them for one reason only: whoever draws and whoever builds must understand exactly the same thing, even if they've never spoken to each other.

An artistic drawing expresses an idea. A technical drawing conveys the shape, size and position of an object exactly: look at a dimensioned pin, every measurement is written down, and two machine shops in two different countries will produce the very same part. When this language is missing, the usual things happen: the pipe that “goes through there” and runs straight through a beam, the wardrobe that hits the window nobody had drawn, the wall “thirty thick” without saying thirty what.

Where the rules come from#
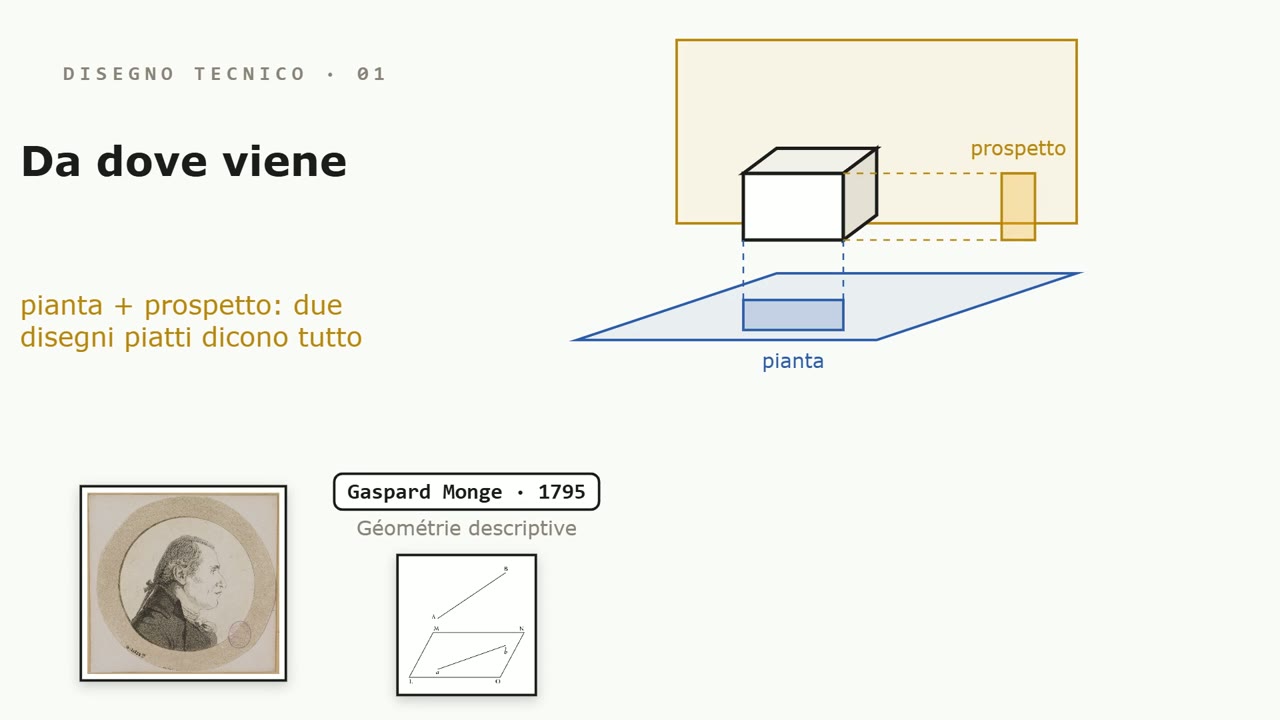
Gaspard Monge, 1795: the box projected in plan and elevation
At the end of the eighteenth century, Gaspard Monge solves the problem with descriptive geometry: how to represent a three-dimensional object on a sheet that has only two dimensions, without losing a single measurement. In the nineteenth century, industry needs everyone to draw the same way, and in the twentieth century ISO turns the method into written standards, which reach Italy through UNI.

A code like UNI EN ISO 5457 reads like this: ISO, international standard; EN, adopted in Europe; UNI, published in Italy. The course uses four standards: ISO 5457 (sheets), ISO 7200 (the title block), ISO 5455 (scales), ISO 128 (lines).

The sheet#
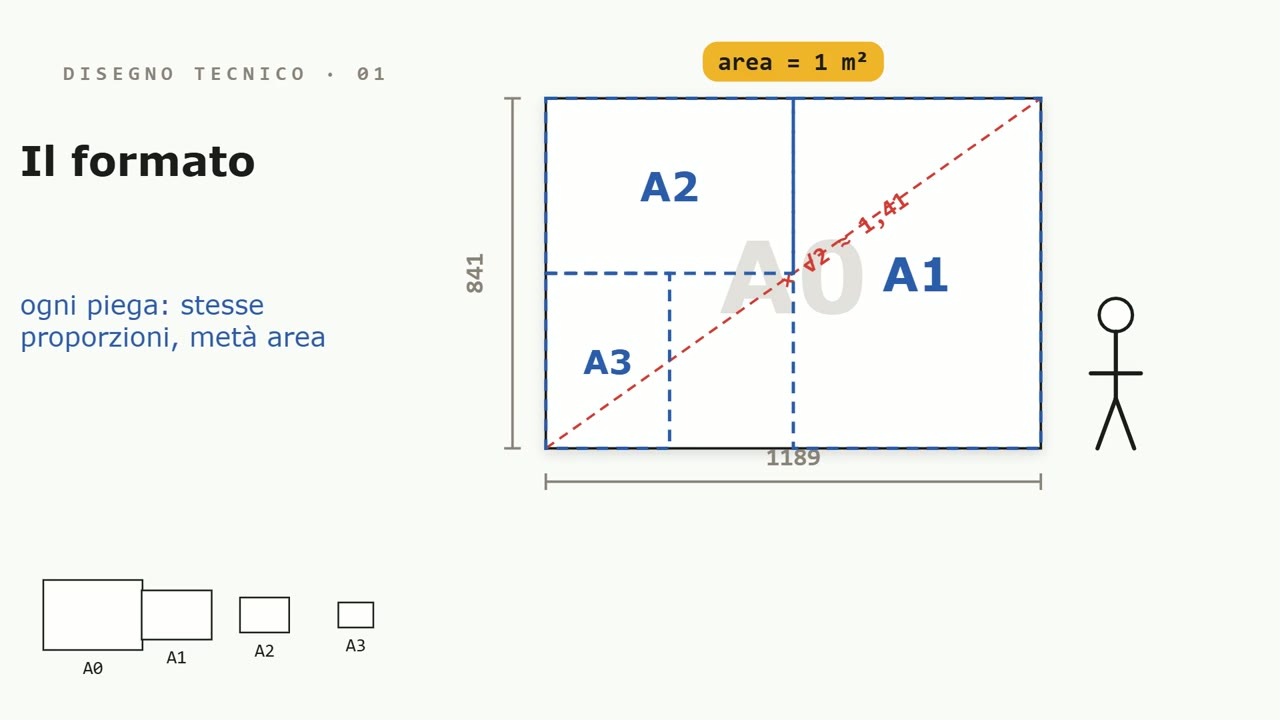
A0 is one square meter: folded in half it gives A1, then A2, A3, A4
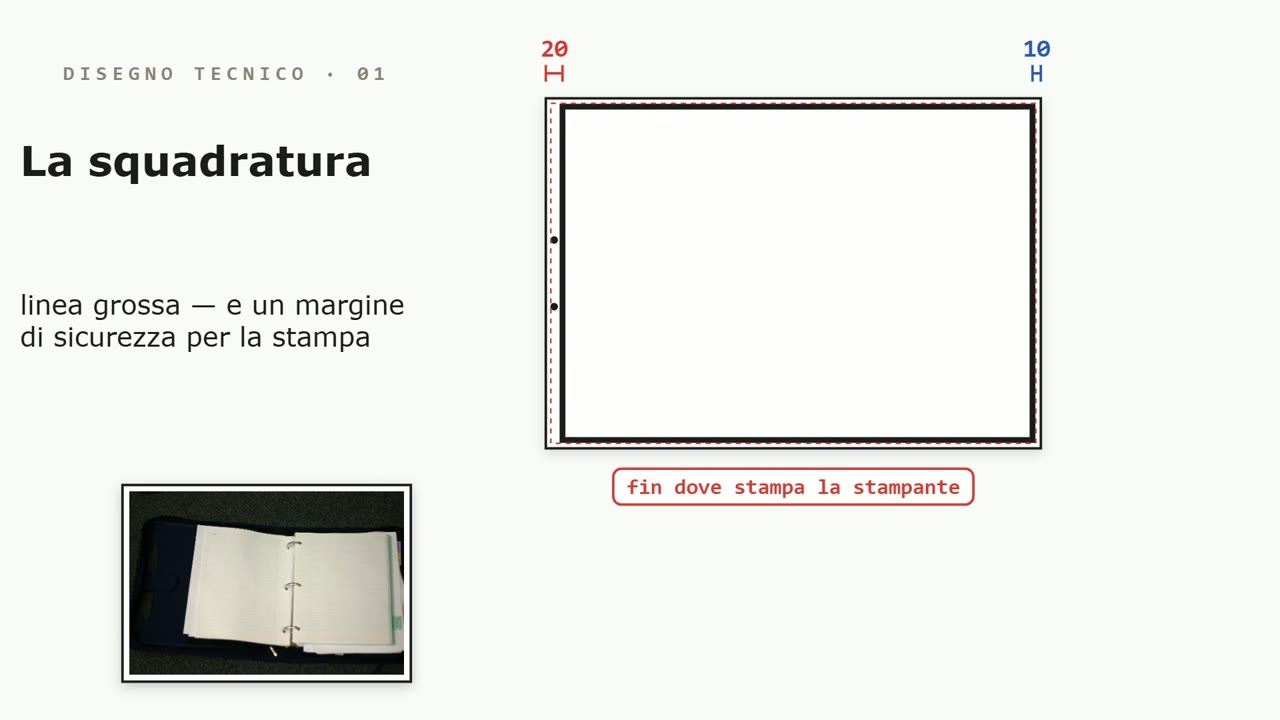
The border: 20 mm on the left for the binder holes, 10 mm on the other sides
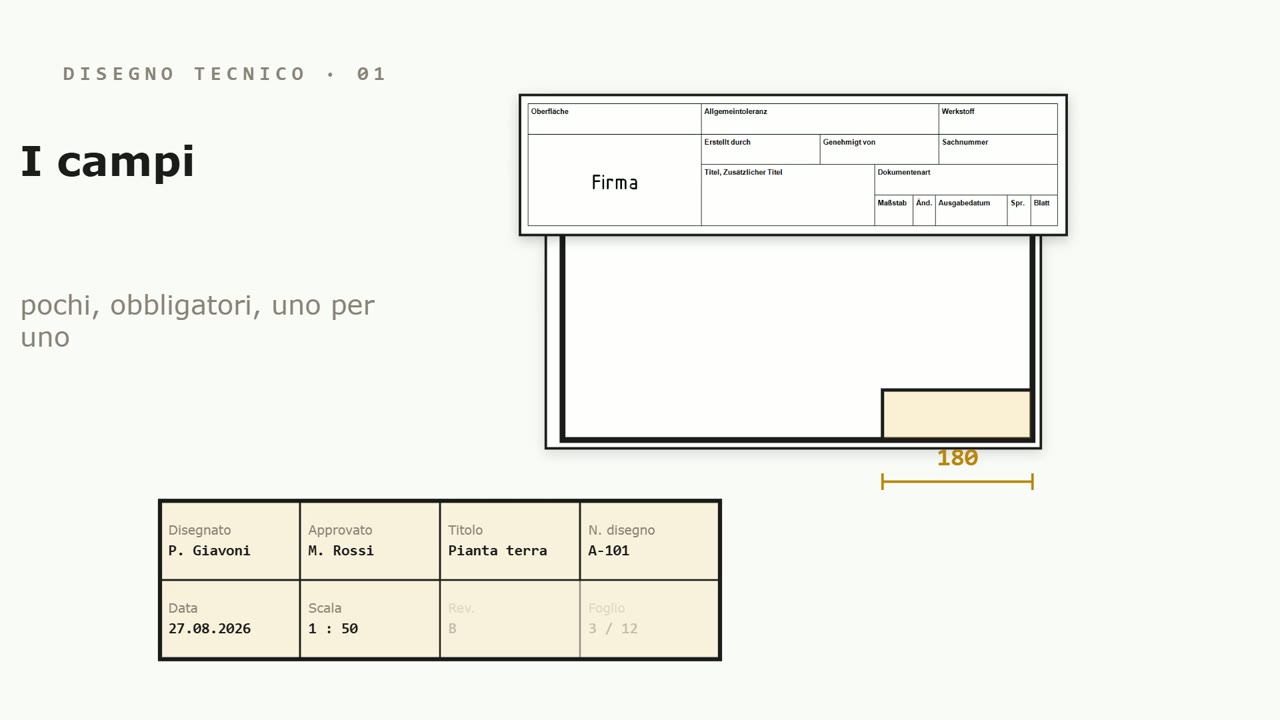
The title block, 180 mm wide: drawn by, approved by, title, number, date, scale, revision
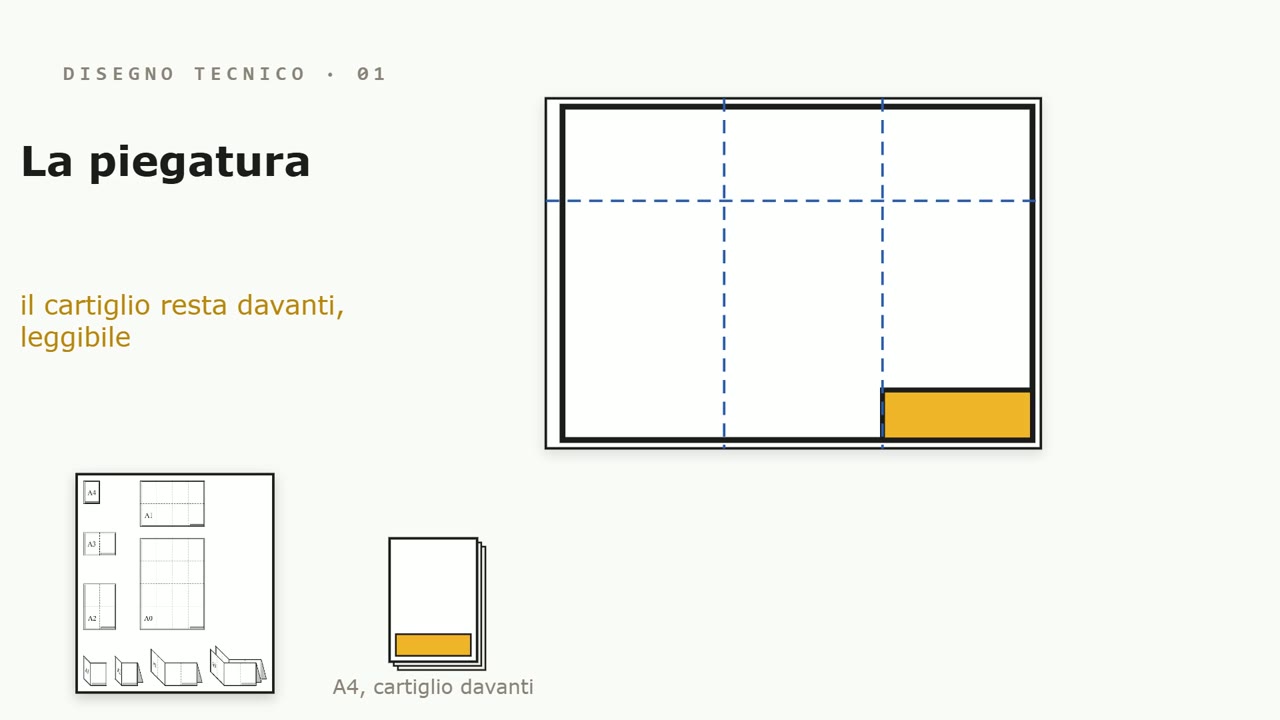
Folding down to A4: the title block stays on the front
The starting sheet is A0, and its area is exactly one square meter. The sides are in a ratio of the square root of two: folded in half it gives an A1 with the same proportions, and so on down to the A4 in your printer. It's the only proportion with this property, and it's why a photocopier can reduce an A3 to an A4 at 71 percent without cutting anything off.

The sizes in millimeters: A0 841 × 1189, A1 594 × 841, A2 420 × 594, A3 297 × 420, A4 210 × 297. The scale decides the sheet size, and what you need to show decides the scale: an apartment floor plan at 1:50 fits on an A3, a full floor of an apartment building needs an A1.

Inside the sheet:

  • the border, with a 20 mm margin on the left for the binder holes and 10 mm on the other sides;
  • the title block in the bottom right corner, always 180 mm wide, with who drew it and who checked it, the title, the number, the date, the scale, the revision, the sheet “3 of 12” and the projection method;
  • the service marks in the margin: centering marks, grid references every 50 mm (“look at C4”), trim marks;
  • the accordion fold down to A4, with the title block staying on the front.

A title block without a date, a revision or a scale has real consequences on site. A drawing without a title block isn't a document: it's just a sheet of paper.

Scale#
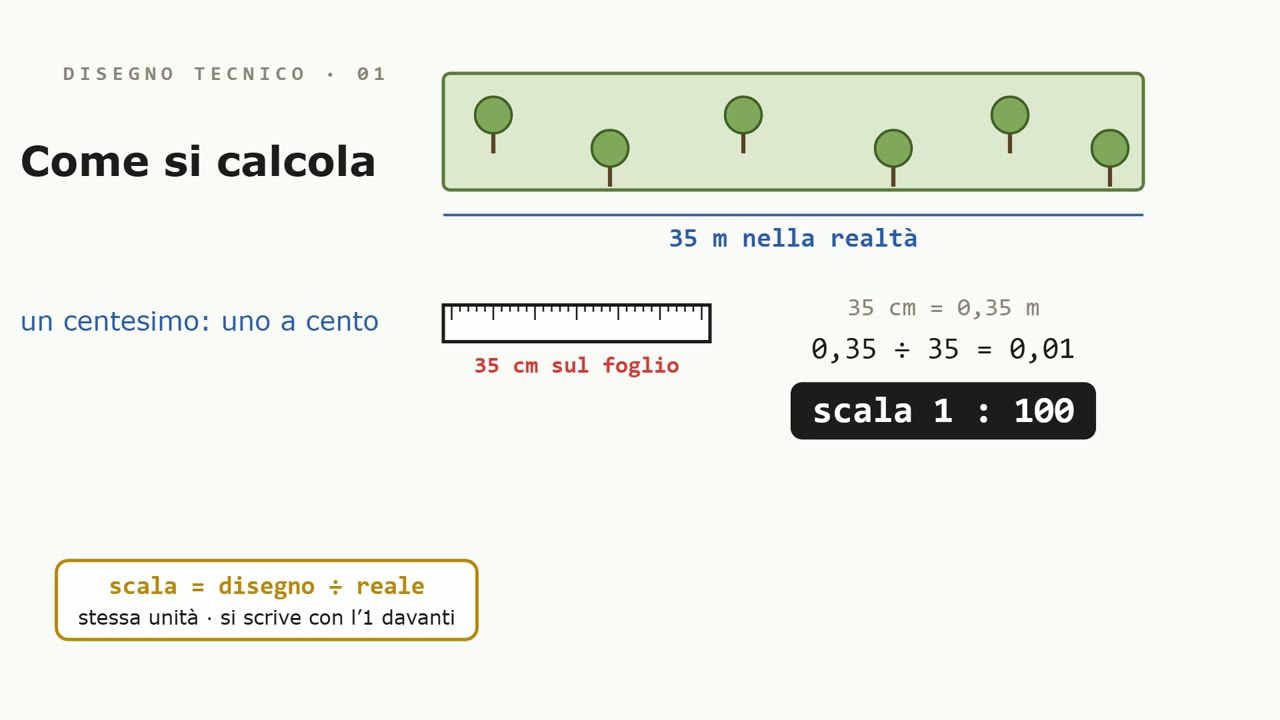
The math: 35 cm on the sheet for 35 m of land, 0.35 divided by 35, scale 1:100
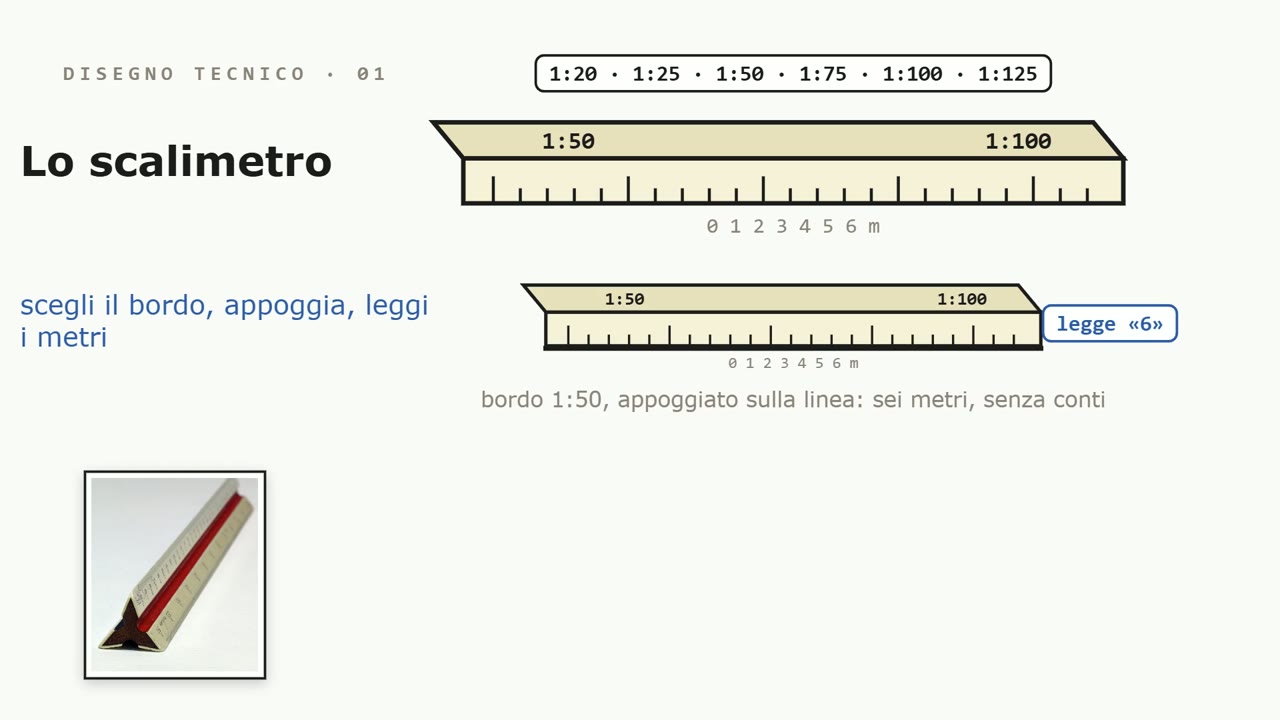
The scale ruler: pick the edge with the drawing's scale, lay it down, read the meters
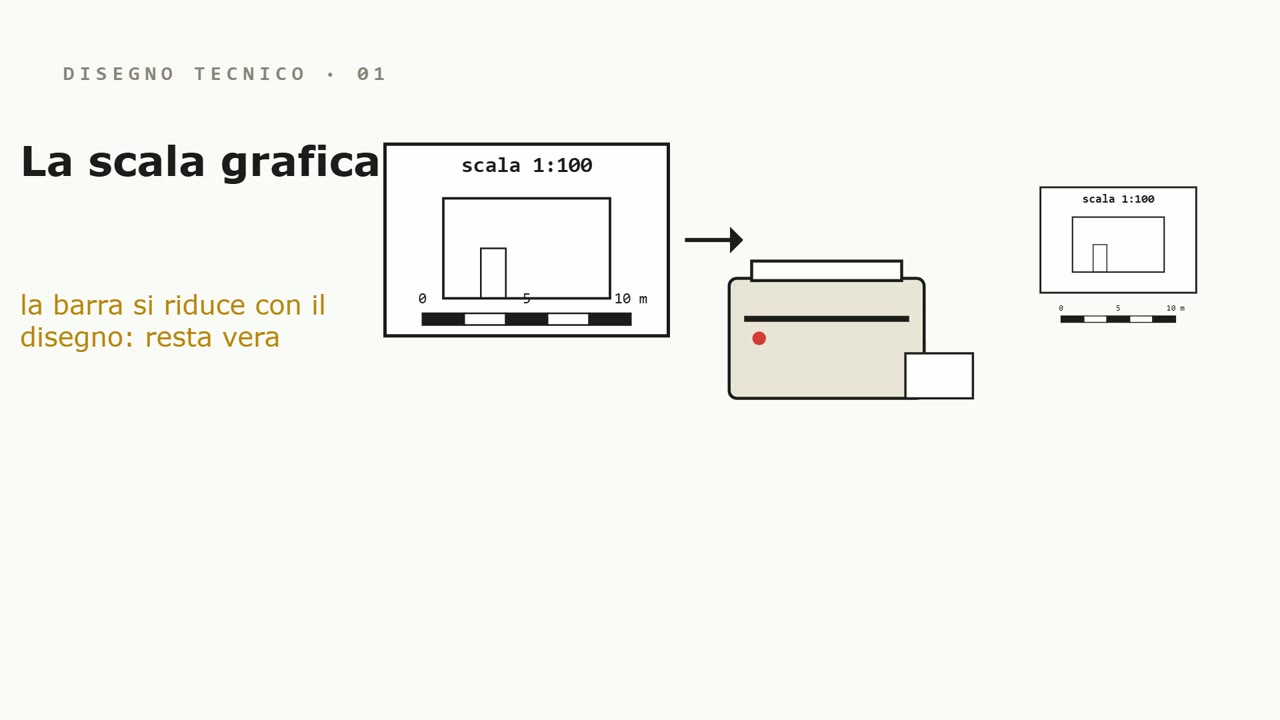
The graphic scale shrinks along with the drawing and stays true
Scale is the ratio between the measurement on the drawing and the real measurement. 1:50 means one millimeter on the sheet equals fifty millimeters in reality: a reduction. 5:1 is an enlargement. The first number is always the drawing, the second is always reality.

Scales aren't made up: the standard sets a series (1:2, 1:5, 1:10, 1:20, 1:50, 1:100, 1:200, 1:500, 1:1000, and 2:1, 5:1, 10:1) because the scale ruler has exactly those. Each design phase has its own: 1:5000 for the master plan, 1:100 for the building permit, 1:50 for construction drawings, 1:20 and 1:5 for details.

The math: a 35-meter plot on 35 centimeters of paper is 0.35 divided by 35, that is, 1:100. A six-meter wall at 1:50 is 6000 divided by 50: 120 mm on the sheet. An 8 mm screw at 5:1 is 8 times 5: 40 mm. If the first number is one, you divide; if the second is one, you multiply.

Two rules matter more than the rest: the drawing always shows the real dimensions (the wall is labeled 600, never 120), and when the drawing may be reduced or viewed on a screen, you add a graphic scale, the bar that shrinks along with the drawing and stays true.

The exercise#
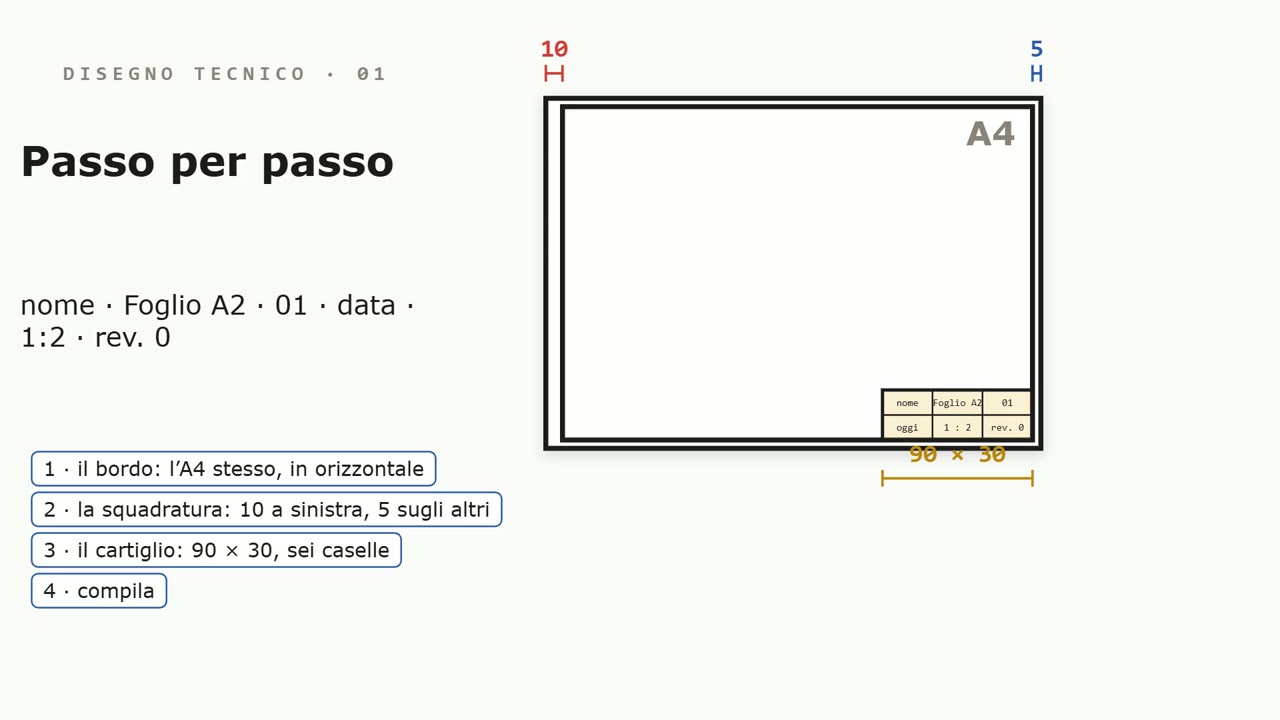
The exercise: a complete A2 drawn at 1:2 scale on an A4
On an A4, at 1:2 scale, draw a complete A2 sheet: border, filled-in title block, centering marks. Do the math first: 420 × 594 at 1:2 comes to 210 × 297, exactly an A4. Then, on the back, work out the scale calculations for a house 12.50 m wide at 1:50, 1:100 and 1:200, with the sheet size you'd choose for each. The solutions are at the start of lesson 2.

Watch the video#

A full lesson of about half an hour, with the drawings taking shape as the narration goes, three quizzes where you pause and answer, examples from the job site and the machine shop, and the exercise guided step by step. Next episode: lines. The video is in Italian.

The full video is on YouTube: if you enjoyed it, subscribe to the channel and hit the bell for the next episodes.

Questions or comments?

Questions about the videos and the books are welcome: write to me, or comment under the video on YouTube.

On LinkedIn I post every video from the channel, with a few extra lines.