

The Challenge: Creating Shared Parameters at Scale#
Creating shared parameters in Revit is straightforward — when you need just one or two. But what happens when you need to create 50 parameters for a complex MEP project? Or standardize 100+ parameters across your organization's template?
The manual process becomes a nightmare:
- Open the Shared Parameters file
- Create each parameter one by one
- Select the correct category, group, and data type
- Repeat... 50, 100, or 200 times
This is where Dynamo shines. But here's the catch that trips up most developers: Revit's API doesn't accept plain text for parameter types. You can't just type "Length" or "Text" — you need specific Forge TypeId objects.
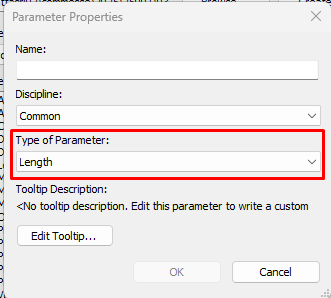
Understanding Parameter Types#
Before diving into the solution, let's understand the two critical type specifications:
Spec Type (Data Type)#
The Spec Type defines what kind of data the parameter will store — text, numbers, measurements, electrical values, etc.
Examples:
autodesk.spec:spec.string-2.0.0→ Textautodesk.spec.aec:length-2.0.0→ Length measurementautodesk.spec.aec.electrical:power-2.0.0→ Electrical power
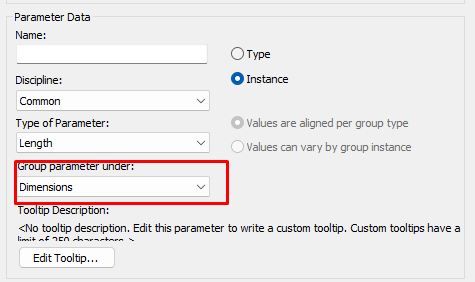
Group Type (UI Placement)#
The Group Type determines which section the parameter appears in within Revit's Properties panel — Dimensions, Identity Data, Electrical, Mechanical, etc.
Examples:
autodesk.parameter.group:identityData-1.0.0→ Identity Data sectionautodesk.parameter.group:dimensions-1.0.0→ Dimensions sectionautodesk.parameter.group:electrical-1.0.0→ Electrical section
The Dynamo Solution#
The key insight is that Excel stores everything as text, but Revit's API requires specific object types. Our Dynamo script bridges this gap by converting text strings into proper Revit API objects.
Script Workflow#
The workflow breaks down into 5 clear steps:
1. Data Input (File Path)
- Locates your Excel file containing parameter definitions
- Simply paste the complete file path to your Excel file
- Important: Make sure the Excel file is closed before running the script
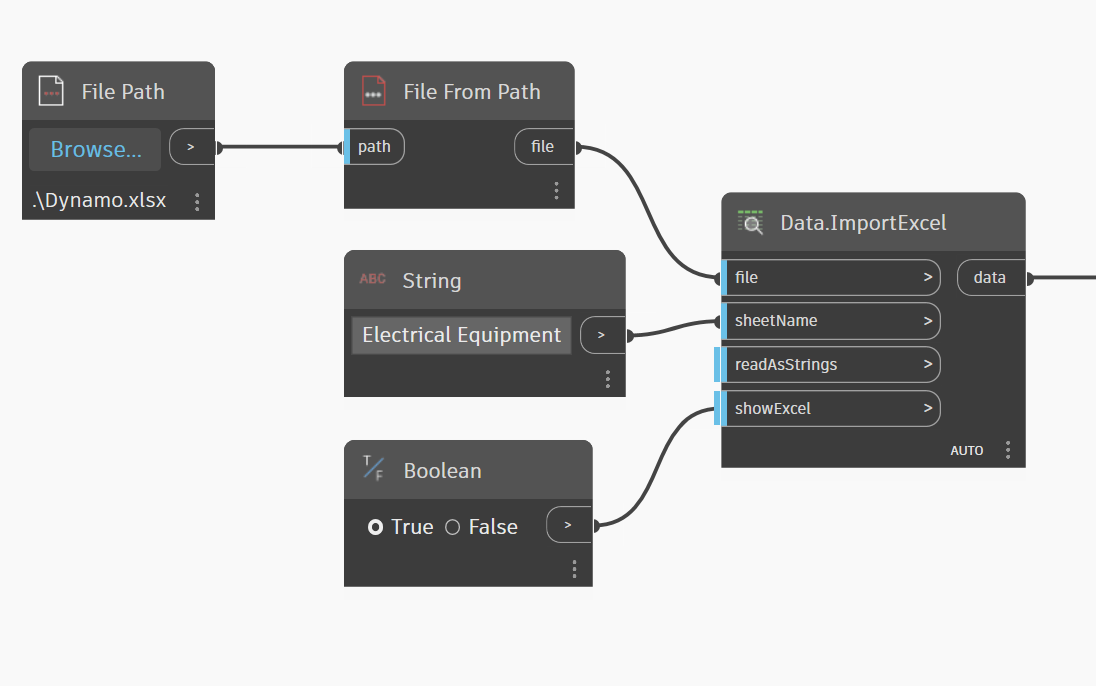
2. Excel Reading (Data.ImportExcel)
- Reads all rows and columns from your Excel spreadsheet
- All data comes out as plain text (strings)
- This raw data needs to be converted to Revit-compatible formats
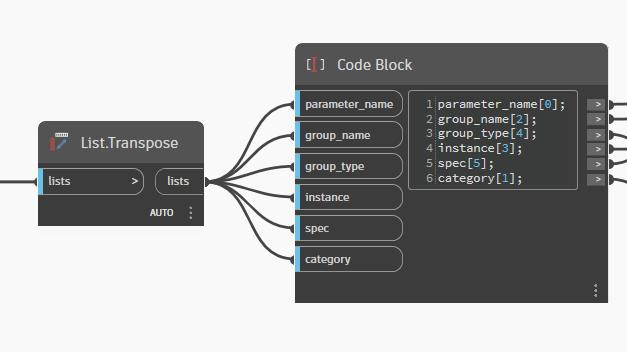
3. Data Conversion (List.Deconstruct + List.Transpose)
- Separates each Excel column into individual lists for processing
- Results in 6 separate lists: name, category, group, instance/type, grouptype, spectype
- Dynamo processes lists more efficiently than tables
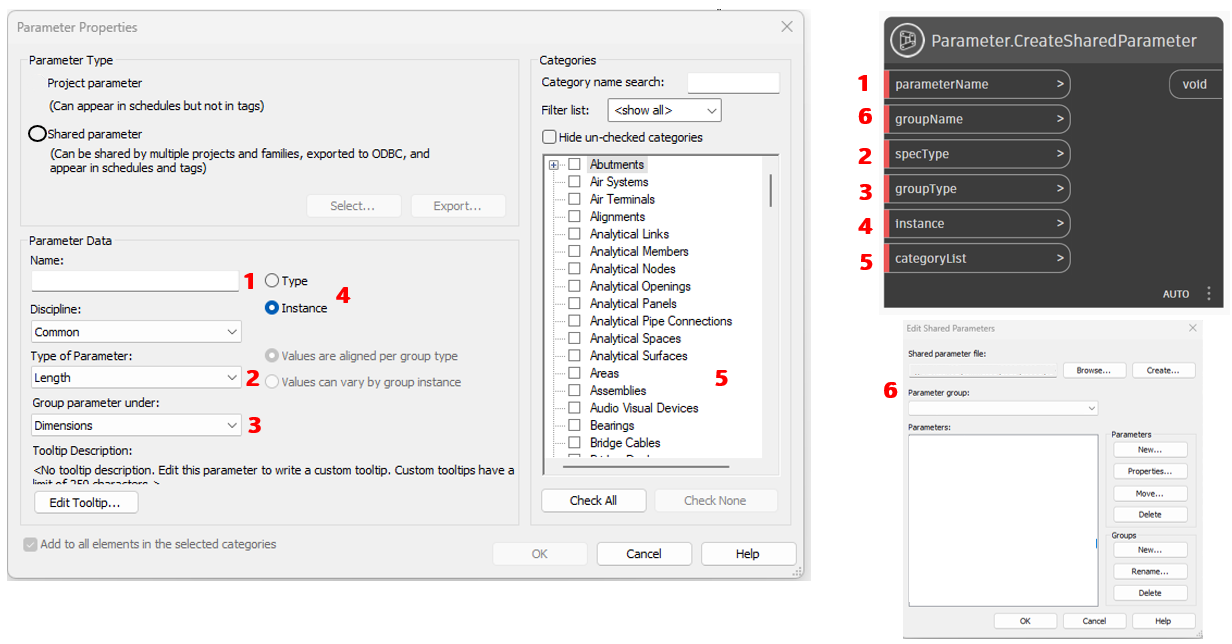
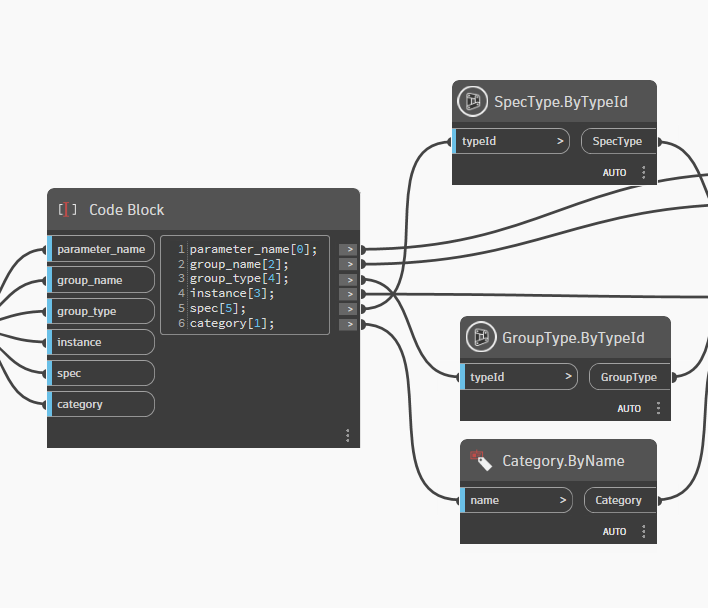
4. Forge Conversion (TypeId Nodes)
- Converts Excel text strings into proper Revit object types
SpecType.ByTypeId: Converts spec type strings into SpecTypeId objectsGroupType.ByTypeId: Converts group type strings into GroupTypeId objectsCategory.ByName: Converts category names (like "Walls") into Category objects
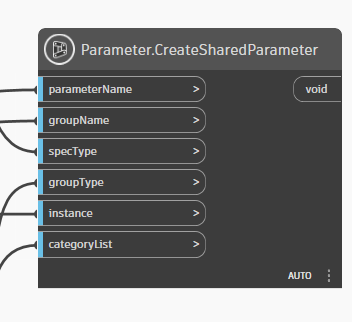
5. Parameter Creation (Parameter.CreateSharedParameter)
- Creates the actual Shared Parameters in your Revit project
- Receives all the converted data from previous steps
- Parameters appear in your Revit project immediately
Excel Template Structure#
Your Excel file must have exactly these 6 columns in this exact order:
1. parameter_Name — The name that appears in Properties
Examples: ELEC_PANEL_RATING, STRUCT_BEAM_CAPACITY
2. category — Which Revit elements get this parameter
Examples: Walls, Doors, Electrical Equipment
3. groupName — Custom folder in Properties palette
Examples: Electrical Analysis, Custom Dimensions
4. instance/Type — Instance (TRUE) or Type (FALSE) parameter
Examples: TRUE, FALSE
5. grouptype — Predefined Revit property section
Example: autodesk.parameter.group:electrical-1.0.0
6. spectype — Data type the parameter stores
Example: autodesk.spec:spec.string-2.0.0
Working Example#
Here's a ready-to-use example for elevator equipment parameters:
1parameter_Name category groupName instance/Type grouptype spectype2SRE_ELEVATOR_TYPE Specialty Equipment Specialty Equipment_SRE FALSE autodesk.parameter.group:identityData-1.0.0 autodesk.spec:spec.string-2.0.03SRE_ELEVATOR_STOPS Specialty Equipment Specialty Equipment_SRE TRUE autodesk.parameter.group:identityData-1.0.0 autodesk.spec.aec:number-2.0.04SRE_ELEVATOR_LOAD Specialty Equipment Specialty Equipment_SRE FALSE autodesk.parameter.group:identityData-1.0.0 autodesk.spec.aec:number-2.0.0What this creates:
- 3 parameters for Specialty Equipment category
- Custom group called "Specialty Equipment_SRE" in Properties panel
- Mix of text (TYPE) and numeric (STOPS, LOAD) parameters
- Some instance-level (STOPS) and some type-level (TYPE, LOAD) parameters
Quick Reference: Common Parameter Types#
General Types#
Type | SpecType |
|---|---|
Text | spec.string-2.0.0 |
Number | spec.aec:number-2.0.0 |
Yes/No | spec:spec.bool-1.0.0 |
Dimensions#
Type | SpecType |
|---|---|
Length | spec.aec:length-2.0.0 |
Area | spec.aec:area-2.0.0 |
Volume | spec.aec:volume-2.0.0 |
Discipline-Specific#
Type | SpecType | GroupType |
|---|---|---|
Electrical Power | electrical:power-2.0.0 | electrical-1.0.0 |
Temperature | hvac:temperature-2.0.0 | mechanical-1.0.0 |
Structural Force | structural:force-2.0.0 | identityData-1.0.0 |
Note: All SpecTypes start with
autodesk.spec.aec.and GroupTypes withautodesk.parameter.group:
Tips for Success#
Pre-Run Checklist#
- Excel file saved and closed
- Correct file path in "File Path" node
- Data filled following template exactly
- Revit open with an active project
Common Errors and Solutions#
Error | Solution |
|---|---|
"Cannot find file" | Check if the path is correct |
"Invalid SpecType" | Use exactly the codes from Forge list |
"Parameter already exists" | Parameter was already created before |
"Invalid Category" | Category name must be in English |
Best Practices#
- Multiple categories: Separate with semicolons:
"Walls;Doors;Windows" - Unique naming: Use prefixes to avoid conflicts:
"SRE_","MEP_","STRUCT_" - Test incrementally: Start with 1-2 parameters before creating large batches
- Always backup: Save your Revit project before running the script
- Close Excel: Make sure your Excel file is closed when running Dynamo
Conclusion#
Automating shared parameter creation saves hours of tedious manual work. The key insight is understanding that Revit requires proper Forge TypeId objects, not plain text strings. With the right Excel template and Dynamo script, you can create hundreds of standardized parameters in seconds.
The complete Dynamo script and Excel templates are available in our DynaGuide repository.
Have questions about parameter automation? Leave a comment below or reach out to our support team at support@unibim.io
Questions or Feedback?
I'd love to hear your thoughts on this article. Reach out directly and let's start a conversation.
Follow me on LinkedIn for more BIM tips and updates